100 days of Angular 2 - Day 4: Making dev/prod Webpack profiles
So yesterday's post was a long and arduous trip to get Webpack up and running locally as a dev environment.
Today I want to figure out how to get Webpack configured for a production environment.
Angular 2 + Webpack for dev (local) and production
I'll start first by splitting the Webpack config file into three files:
webpack.config.js will actually consist of just one line:
module.exports = require('./webpack.dev.js');
This is what the Angular 2 docs on Webpack suggest, since from looking at the Webpack dev server docs there is no way to specifiy a config file when running webpack-dev-server. This seems really silly to me, since running the webpack command lets you specify a config file which we'll take advantage of.
webpack.common.js will contain shared, common configuration used in the next two files.
webpack.dev.js will contain configuration for my local environment. I'll use the webpack-merge module to merge webpack.common.js with webpack.dev.js. (As an aside, I find it kind of crazy that I have to use a special Webpack specific module to merge two .json files).
webpack.prod.js will contain the bits for a production build, which will be used in the deployment later. Note the distinction between a build and deployment, as I'll get into that later. (In the dev environment the builds and deployment sort of happen together).
I'll actually put the latter three files into a folder named config to keep the project organized.
As one might expect, the command to run in a dev environment is different than the command to do a production build:
Dev:
$ webpack-dev-server --inline --progress --port 8085
Production build:
$ rimraf dist && webpack --config webpack.prod.js --progress --profile --bail
If you're unfamiliar with rimraf, it's a npm module described as "The UNIX command rm -rf for node." Surprisingly, at least for me, is that a whole module (400 lines of code, 200 lines of test code) is necessary to do rm -rf in node. But moving on...
Anyways, there are a bunch of new dev dependencies added for the production build. As summarized from the Angular 2 Webpack docs:
- NoErrorsPlugin - stops the build if there is any error.
- DedupePlugin - detects identical (and nearly identical) files and removes them from the output.
- UglifyJsPlugin - minifies the bundles.
- ExtractTextPlugin - extracts embedded css as external files, adding cache-busting hash to the filename.
- DefinePlugin - use to define environment variables that we can reference within our application.
Once I pulled the webpack.*.js settings into separate I tried running the dev server again to make sure I didn't screw anything up, and then finally a production build.
Here's what happens when I run npm run build (I've pointed out what I've found interesting)
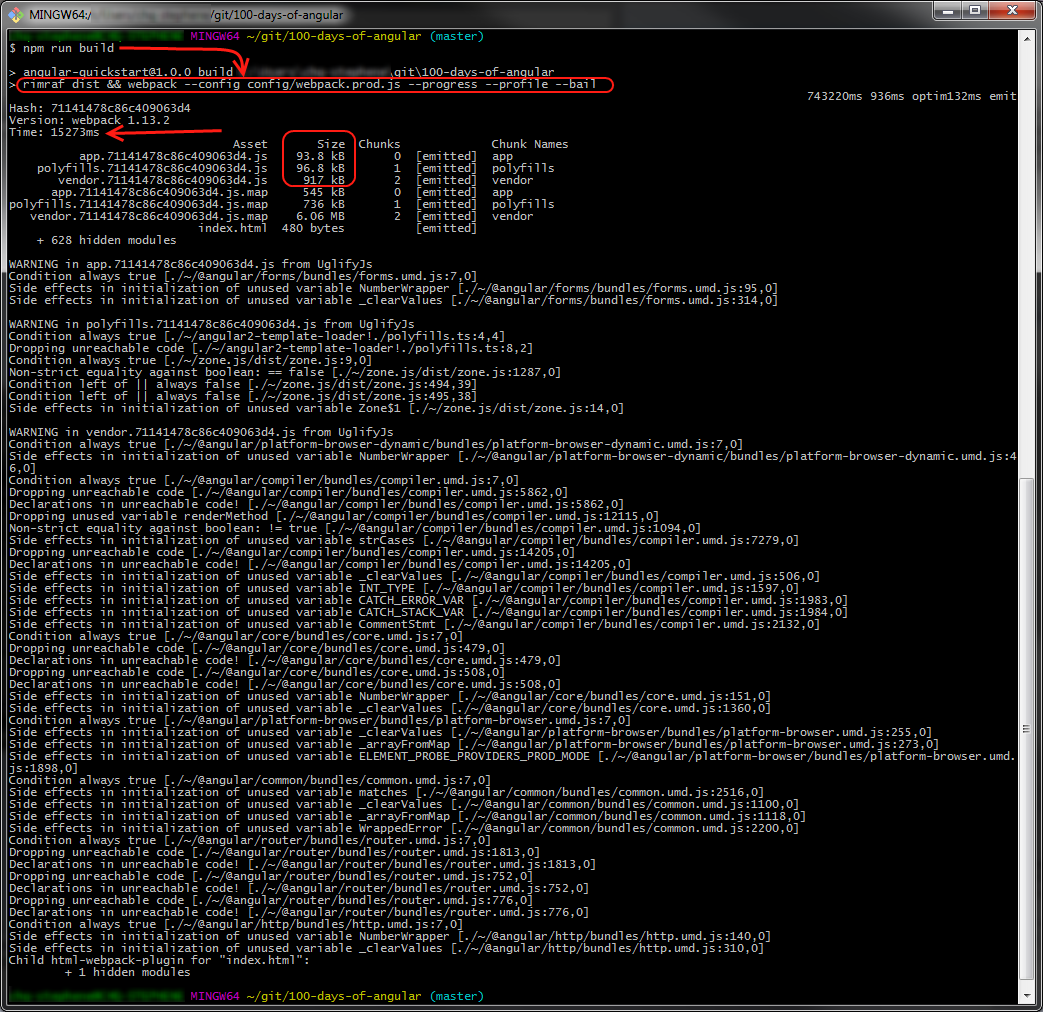
npm run build in turn runs rimraf dist && webpack --config config/webpack.prod.js --progress --profile --bail which is specified in the package.json. Easier to remember the word build than all the other stuff.
It takes about 15 seconds for Webpack and all the plugins to do their stuff.
Here's what we get:
Three .js bundles, two of which are kind of small, but that vendor.[hash].js file is pretty big -- 917 kB! What was in vendor.ts that's taking up so much space?
// Angular
import '@angular/platform-browser';
import '@angular/platform-browser-dynamic';
import '@angular/core';
import '@angular/common';
import '@angular/http';
import '@angular/router';
// RxJS
import 'rxjs';
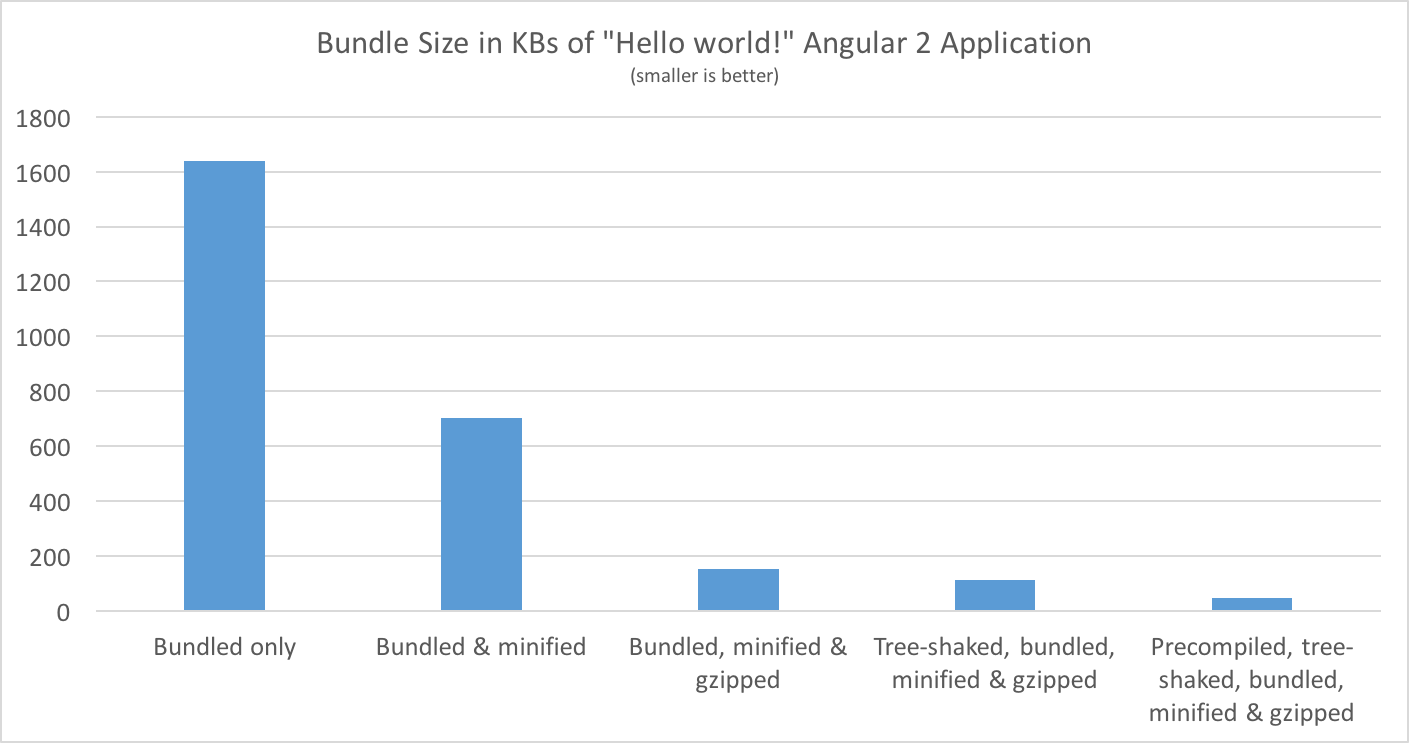
Hmm... That's all necessary Angular stuff. Still seems that 917 kB to send to the user for a basic Hello World app is a lot. I can think of a couple things to look into down the road:
- Tree shaking (use a static analyzer to remove unused code)
- Gzipping (compressing) the files
Some quick googling led me to this article on the subject of which I'll just quickly show this chart from the article that I found inspiring for future research:
I am already minifying the bundle using the UglifyJs plugin, so out of curiosity I'll gzip the big vendor.[hash].js file
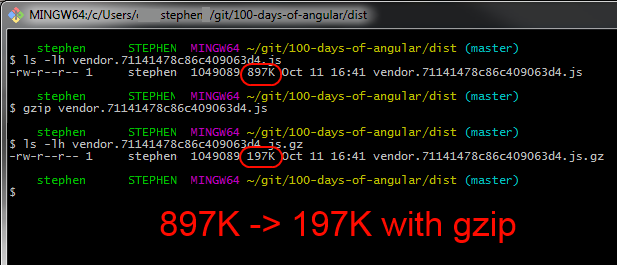
(Webpack reports the file to be 917 kB but ls -lh reports it as 897K)
That's pretty dramatic, but not too surprising. Just a reminder, since I've seen a few websites without gzip enabled, be sure to enable gzip on your webservers! Gzip is useful for any text compression, so that includes HTML, CSS, JavaScript, etc.
The .js.map files are big, but those are just served when debugging so that's not important.
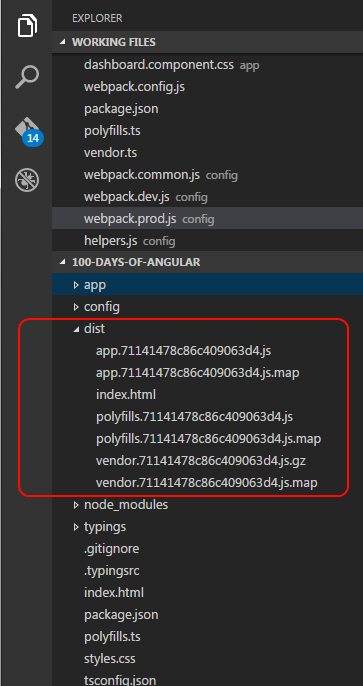
What to do with the bundled Angular 2 files in /dist?
So, I've got Webpack transpiling, bundling and uglifying all of .ts code into respective app, vendor, and polyfill .js files that get placed in the /dist file, along with the index.html file as well.
Now the question is: What to do with them in a production environment? There are a few options:
Option A: Create a simple Node.js webserver and treat the /dist directory as a static folder.
Just a few lines are needed when using Express:
var express = require('express');
var path = require('path');
var app = express();

// Define the port to run on
app.set('port', 8085);

app.use(express.static(path.join(__dirname, 'dist')));

// Listen for requests
var server = app.listen(app.get('port'), function() {
  var port = server.address().port;
});
Option B: Use an already built http server like Node's http-server
It's a better alternative than lite-server for production environments, and it's more robust than using option A above. This is also what the popular Angular Class Webpack Starter decided to use for their production environment as you can see in their package.json. Be sure to stick Apache, NGINX or something in front of it though if you go this route and plan to share with the world wide web.
Option C: Commit the folder to a GitHub pages branch and let GitHub host them.
This is what the angular2-cli does. Be sure to note of this trick for SPA (single page applications) with GitHub pages. There's more info on what GitHub pages are if you're not familiar.
Option D: Fold Express into the Angular 2 app
Another option is to turn this Angular 2 project into an Express project and move all the Angular related stuff into it's own directory. You'd end up with a few folders, like
100-days-of-angular/
 ├──client/             * Angular 2 stuff
 |   ├──main.ts
 |   ├──app.component.ts
 |   ├──etc
 │
 ├──public/             * Bundled/transpiled dist
 │   ├──index.html
 │   ├──app.js
 │   ├──vendor.js
 │   ├──polyfills.js
 │
 ├──server/             * Express stuff
 |   ├──bin/
 |   ├──routes/
 │   ├──app.ts
 |   ├──config.ts
 │
 ├──package.json
Because I'm going to be developing the front (Angular2) and back end (Node.js) together, I'm going to go with this option, since this let's me test and develop both.
But I don't have any back end (server side) logic yet, so for day 4 I'm just going to use the http-server module to host the /dist files. In the future, such as when I have server side logic and/or a database to interact with, I'll start to explore this option.
Option E, F, G... Host them with your favorite back end framework
There are Spring MVC / Spring Boot packages if Java is your thing, and Asp.NET options too, but I don't really care for them so I'm not going to go into much detail here.
Heroku is probably an option too if you want to do some googling.
Day 4 temporary hosting solution
Mentioned above, I'm going to go with Option B today and explore Option D tomorrow. First I'll stop the hacky lite-server that's running.
(on my remote server)
$ screen -r (to reattach my running session)
Ctrl-C (to stop the running lite-server process)
Then update my code and dependencies:
$ git pull
$ npm install (to get the new dependencies)
$ npm install http-server -g (to install http-server globally)
Then make a build and host it:
$ npm run build
$ http-server ./dist -p 3000
Unfortunately I realized there are two more steps. First is webpack was still getting confused by the old .js files that were left over from back when I was using the tsc transpiler. So I had to delete those from the app/ folder and run a build again.
The other thing is what to do with the running process. I'll use screen again and just detach from it so the server stays running after I close the terminal. So in summary:
$ screen
$ npm run build
$ http-server ./dist -p 3000
(Ctrl-A and 'd' to detach the process)
Note this is still not a robust way to keep the server humming along. As an example, what if the http-server crashed? It would not auto restart and no one would be able to visit the site until I noticed it and restarted it.
But I'll explore the more robust option tomorrow.
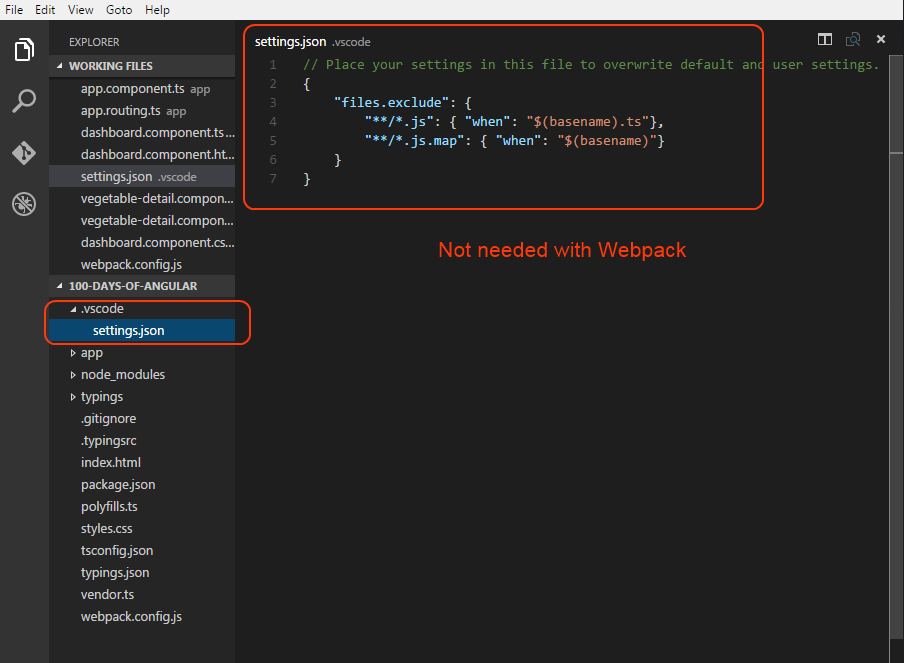
Addendum A: No need to hide derived .js files with Webpack
Back when I was running my dev environment with tsc -w lite-server and SystemJS handling all the JavaScript files I ended up with a bunch of derived (autogenerated) .js and autogenerated .js.map files alongside all of the .ts source files.
I had created a settings.json for the project so Visual Studio Code would hide the derived files. Since the Typescript loader and webpack dev server handles the transpilation/serving differently, there aren't any more derived .js files in the project anymore and I deleted the settings.
Okay, that's enough for day 4. As a reminder, the full code is available on GitHub.
Tomorrow I'll look into bringing Express into the project and the benefits that come with that. See day 5 here.