Automating Picture Capture Using Webcams on Linux/Ubuntu
Ever want to turn a laptop into a webcam surveillance monitoring tool, or use a USB webcam to take pictures every 5 minutes to record a timelapse video? Or maybe you just want to monitor your room remotely and on demand? Here's a good weekend (or day) project:
-
Installing Linux/Ubuntu on a laptop computer
-
Setting up SSH so I could remotely connect to the computer
-
Make sure Linux detects the webcam
-
Trying various command line webcam tools (fswebcam, ffmpeg, MPlayer, VLC)
-
Configuring crontab (creating a cronjob) to run every 5 minutes or hourly
-
Viewing the pictures in a web browser
Installing Linux (Ubuntu) on my laptop
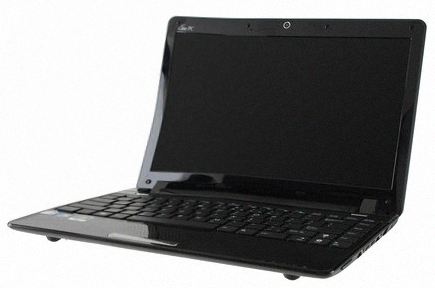
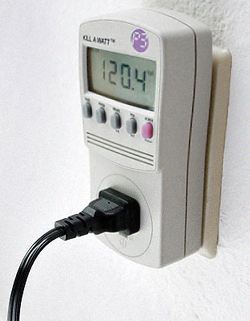
Over the weekend I decided to turn one of my old laptops into a Linux server. My old netbook, the ASUS 1201N was a perfect candidate since netbooks are designed to run with extremely low power consumption. Though the AC adapter for the ASUS 1201N is rated to output a maximum of 40 watts, I used my handy dandy Kill-O-Watt meter to measure the real power usage. Turns out it's typically only 20W at idle, and around 25W under load. While this isn't as ideal as a Raspberry Pi (which can run on only 5W) the difference in cost isn't too crazy.
5 Watts for 1 month = 3.65 kilowatt hours at current prices = $0.32 / month
20 Watts for 1 month = 14.6 kilowatt hours at current prices = $1.28 / month
So I am happily paying $1.28 per month in electricity to have my very own Linux server running 24/7, complete with a 1.60 GHz dual core Intel Atom N330 CPU and 2 GB of memory. Quite a bit more than the Raspberry Pi, which can be helpful for doing video and image encoding.
How do you install Ubuntu? You just go to the Ubuntu website and download it. I actually used the Windows bootable USB utility which made the process pretty simple. Note that the desktop version of Ubuntu does not come (by default) with an SSH server (more on that below), but its pretty easy to set up. The server version of Ubuntu can come with an SSH server if you select it during the install process.
Installing SSH and Configuring SSH Open Server
If you want to be able to connect to your new Ubuntu machine remotely, you'll need to install and have an SSH server running. You can do this if you have the desktop version of Ubuntu too. (I downloaded the desktop version). It's pretty simple to get an SSH server:
sudo aptitude install openssh-server
That's it! For more information on configuring SSH, see this excellent openSSH server guide that the Ubuntu community put together.
I changed the default port number from 22 to a random higher number to make it a little harder for random people out on the internet to try to log in. (They would still have to guess the username and password anyways, but this helps too). Speaking of which, if you're behind a router (like if you live at home), you'll need to set up port forwarding so you can log in remotely. Some more information about port forwarding can be found here.
How does Linux detect your webcam?
Well if it's a USB webcam, plug it in. If it's an integrated webcam built into the laptop, there's nothing to plug in. Ubuntu should automatically detect and install drivers for the webcam. To see if it's detected, let's run some commands:Here's a command to see if any video device nodes exist:
stephen@ubuntu:~$ ls -l /dev/video*
crw-rw----+ 1 root video 81, 0 Mar 18 20:29 /dev/video0
crw-rw----+ 1 root video 81, 1 Apr 2 08:03 /dev/video1
And here's another command to find out about the devices:
stephen@ubuntu:~$ lsusb
Bus 001 Device 003: ID 046d:0990 Logitech, Inc. QuickCam Pro 9000
Bus 001 Device 002: ID 13d3:5111 IMC Networks Integrated Webcam
Bus 004 Device 002: ID 0b05:1788 ASUSTek Computer, Inc.
Bus 001 Device 001: ID 1d6b:0002 Linux Foundation 2.0 root hub
Bus 002 Device 001: ID 1d6b:0002 Linux Foundation 2.0 root hub
Bus 003 Device 001: ID 1d6b:0001 Linux Foundation 1.1 root hub
Bus 004 Device 001: ID 1d6b:0001 Linux Foundation 1.1 root hub
More information on lsusb can be found by reading the lsusb 'man page' (otherwise known as the manual). You can also use the lsusb command to learn more about the resolution of the webcams. Just change the Bus and Device numbers that you found above.
stephen@ubuntu:~$ lsusb -s 001:002 -v | egrep "Width|Height"
wWidth 640
wHeight 480
wWidth 800
wHeight 600
wWidth 1024
wHeight 768
wWidth 1280
wHeight 720
If for some reason you plug in the webcam but it doesn't show up (in /dev/video* or lsusb), try looking at the recent driver messages for clues:
stephen@ubuntu:~$ dmesg|tail
fswebcam, ffmpeg, MPlayer, and VLC
There are a few command line tools that will let you take a picture using your webcam. I've tried three different tools and found that I liked fswebcam the most, but I've listed all of the options here:Note that you might need to change your device from /dev/video0 to perhaps /dev/video1! Check the above section to see what webcam is detected.
ffmpeg
ffmpeg -f video4linux2 -i /dev/video0 -vframes 1 test.jpg
ffmpeg -f video4linux2 -s 640x480 -i /dev/video1 -vframes 1 /home/stephen/webcamphotos/$(date +\%Y\%m\%d\%H\%M).jpg
fswebcam
fswebcam -d /dev/video0 -r 640x480 --jpeg 85 -F 5 test.jpg This uses a compression factor of 85 (good tradeoff of quality/size) and captures 5 frames (for less noise in image).MPlayer
mplayer tv:// -tv driver=v4l2:device=/dev/video0:width=640:height=480 -frames 3 -vo jpeg
VLC
vlc -I dummy v4l2:///dev/video0 --video-filter scene --no-audio --scene-path /home/stoppal/test --scene-prefix image_prefix --scene-format png vlc://quit --run-time=1
Some notes about the Logitech Quickcam Pro 9000

stephen@ubuntu:~$ fswebcam -d /dev/video1 -r 1600x1200 --jpeg 85 -F 5 /home/stephen/webcamphotos/$(date +\%Y\%m\%d\%H\%M).jpeg
--- Opening /dev/video1...
Trying source module v4l2...
/dev/video1 opened.
No input was specified, using the first.
Adjusting resolution from 1600x1200 to 960x720.
--- Capturing 5 frames...
Captured 5 frames in 0.40 seconds. (12 fps)
--- Processing captured image...
Setting output format to JPEG, quality 85
Writing JPEG image to ~/home/stephen/webcamphotos/201304051633.jpeg.
Wait a second! Why did it adjust the resolution to 960x720?
It turns out we need to force it to use a YUYV palette instead of the default
stephen@ubuntu:~$ fswebcam -d /dev/video1 -p YUYV -r 1600x1200 --jpeg 85 -F 5 /home/stephen/webcamphotos/$(date +\%Y\%m\%d\%H\%M).jpeg
Configure crontab (make a cronjob) to take a picture every minute or hour
Crontab is a popular *nix utility that executes a command on a user defined interval. Maybe you just want to take a picture every minute, or maybe you want to shutdown your computer Monday through Friday at 10pm. Or maybe you want to run some scripts that backup your data once every 3 months. If you want to run multiple commands you can do so by chaining them with the && keyword, but it's also sometimes worth making a bash script (or maybe a simple Python/Perl/Ruby script) that gets executed as part of the cronjob.To view the current cron jobs for the current user, type crontab -e. To view the current cron jobs for the super user, type sudo crontab -e.
Here are some cronjobs I have set up:
# To take a picture every minute
# */1 * * * * streamer -f jpeg -s 1024x768 -o /home/stephen/timelap/$(date +\%m\%d\%k\%M).jpeg

# To take a picture every hour on the 15 minute mark using a different tool
# 15 * * * * fswebcam -r 1024x768 --jpeg 85 -D 4 -F 10 /home/stephen/webcamphotos/$(date +\%Y\%m\%d\%k\%M).jpeg

# Take a picture and upload it to the webserver every hour
@hourly bash /home/stephen/scripts/take_photo_and_push.sh
The last cronjob calls a bash script that looks like this:
#!/bin/bash
#Take a picture, then push it to a remote webserver

#Take a photo
fswebcam -d /dev/video1 -p YUYV -r 1600x1200 --jpeg 85 -D 2 -F 15 /home/stephen/webcamphotos/$(date +\%Y\%m\%d\%H\%M).jpeg

#Navigate to the directory
cd /home/stephen/webcamphotos/

#Find the most recent jpeg
NEW_JPEG=$(ls -t | grep '\>.jpeg' | head -1)

#Push it to the remote webserver
scp /home/stephen/webcamphotos/$NEW_JPEG stephen@netinstructions.com:/home/stephen/netinstructions.com/homeserver/latest.jpeg
For more information on cronjobs and crontab, take a look at this guide.
If you want to view any logs for the the cron job you can view the logs by typing:
$ grep CRON /var/log/syslog
Viewing/Transferring the Pictures
Okay, so you found a command line utility that takes pictures, and perhaps a cronjob that runs that command every 5 minutes or 10 minutes or every hour or once a day, but how do you look at the picture?There are a couple of ways of doing this. If you're using the desktop version of Ubuntu (with a nice graphical user interface) you just double click on the photo. For the rest of us who are SSH'ing in to a remote machine or are using the server version of Ubuntu or some other Linx distro, we have a few options:
- FileZilla to grab the files and transfer them to our local machines
- If you have a web server (Apache, ngnix, or something else) on the server, move the file to the web directory
- SCP the file to a remote web server. For example, I have a few websites (such as this one) hosted by Dreamhost, and they provide shell access
scp /home/stephen/webcamphotos/$NEW_JPEG stephen@netinstructions.com:/home/stephen/netinstructions.com/homeserver/latest.jpeg
Good luck!